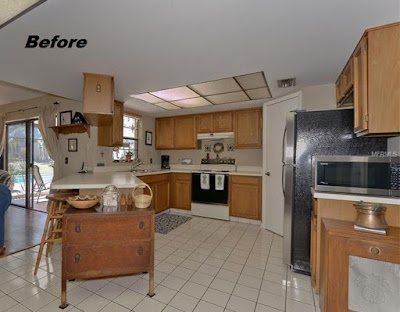
We have not completed the kitchen yet, we have to do the backsplash and paint the kitchen, so the final kitchen reveal will be posted soon! But you can see the before and after of where we are at in our kitchen remodel.
Here is the before picture of our kitchen.
We had priced out doing all new cabinets and counter top, but it was getting too pricey (upwards to $10,000)! We decided we weren't willing to spend that much money. So we chose to repaint our oak wood cabinets, and use the Desert Sand counter top rustoleum product to redo our counter tops!
Because we decided to paint the cabinets and redo the counter top ourselves, we only spent about $500 total to redo our kitchen!!! Compared to spending approximately $10,000+ it was a huge save in money!!These pictures were taken just after painting the cabinets grey, putting on new hardware, and putting up a wainscoting wallpaper on the bar (and also painting that grey).
After finishing painting the cabinets, Mr. Picturesque sanded down the counter tops, cleaned them, then we added the base coat from the rustoleum kit and threw on the paint chips. After drying for 12 hours, we then sanded down the counter tops to create a smooth surface. You can see here pictures what the counters looked like in the middle of the sanding process:
After sanding and getting a relatively smooth top, we wiped the counters down. Next, we added the top coat from the kit, which is basically the sealer. We had to turn off all fans and vents to ensure that it dried well and to prevent dog hair from getting onto the counter top while it cured.
It has been about 12 hours since we added the top coat. We have to wait 48 hours before we can put light items on the counters and a full week before we can use the counters regularly. But I think it is turning out beautifully.
After this cures, I just have to paint the kitchen a seafoam green color, and then put in a backsplash. I also want to replace the lighting soon.
As soon as the kitchen is finished I will post final photos!!
As soon as the kitchen is finished I will post final photos!!
Check back soon to see the finished look!


No comments:
Post a Comment
Thank you for commenting! Check out my other posts to see posts similar to this one!